these
sweet cupcakes from pinterest are what inspired brennas 4th birthday party. we call her "B" all the time so i thought it was fitting and it also looked pimple enough to do on top of halloween costumes and preparing for the crafts sales these next two weekends. i have to say, i thought they were going to be super easy and no big deal... not the case. these babies were destined to melt and be dropped from the get go. before i get into the gory details of the cupcakes i will share some photos of the party.

my version of the the bee cupcakes

the table before they all toppled over :)

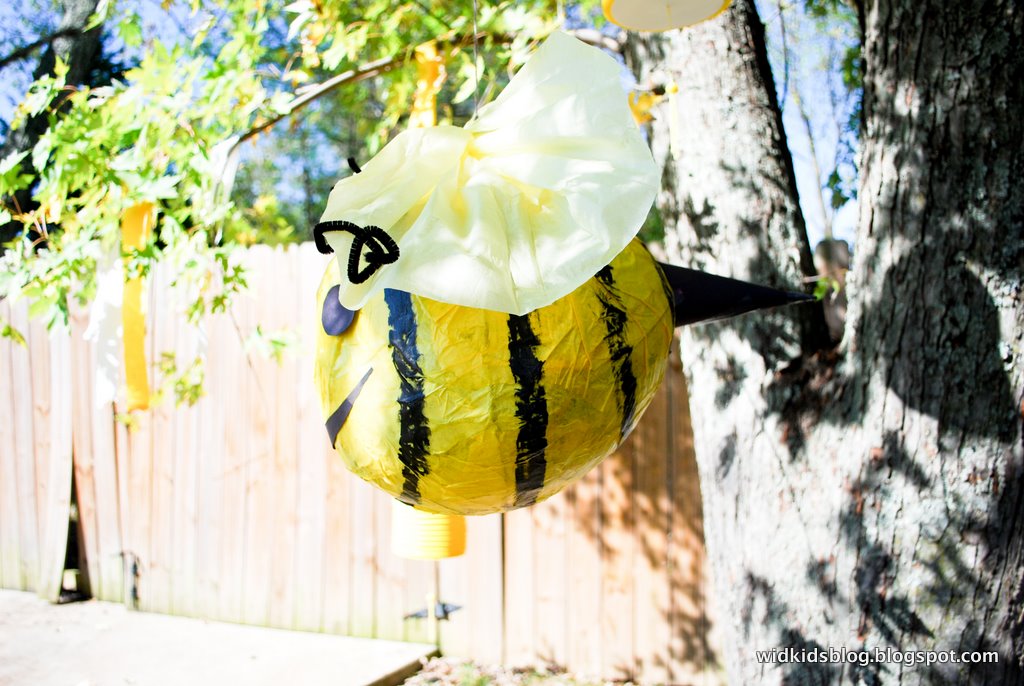
bee piñata made from a ballon and paper mache... you can read about
how to do it here, when we made a piñata for easter one year.

the piñata was almost a disaster as well as it fell apart before i even painted it. i waited until the last minute and didn't have enough layers on it. however, somehow it turned out perfect. it was strong enough that everyone got to swing at it three times and it even looked cute :) this was brennas one request for her party so i was determined to make it happen , even if i was up way to late "making it happen".

we did bumble bee crafts... here is a
link to the original idea.

we sang happy birthday

she blew out her candles

we had a silly string fight :)


she opened gifts

was super excited about her pink horse. :)
even with the cupcakes melting all over the place and then tipping over, we had a great time.
TRIAL and ERROR beehive cupcakes:
i tired to be prepared ahead of time (a little) and get the cupcakes done the night before the party. i tinted some white icing to give it a golden yellow look, then i made my own pastry bag out of a sandwich bag and piped the yellow icing in a circle onto the cupcakes. it was pretty simple, but not as pretty as the tall original photo. i tired to find out how they made their bees and it seemed like everywhere i looked i was coming up with gum paste or fondant and i didn't want to get that involved in making them. i thought yellow jelly beans and black icing would work. since halloween is right around the corner, i was able to buy a little tube of black icing. i was still stumped on the wings and then i remembered we had some saltwater taffy in the cabinet. so i went to work squeezing out tiny black stripes on tiny yellow jelly beans, then i pinched out white wings from the taffy and carefully added them to the bees. after the bees were complete, i oh so gently placed them on the "hives". not hard but very time consuming. i had to make about 20 bees. i went to bed feeling pretty accomplished but when i woke up in the morning i found my hives sunk down and the bees wings completely melted away. not sure why this happened but the taffy just pretty much slid right off the bee and down the hive. i had to come up with another idea. i had a roll of crate paper for decorating and just took a little piece of it, folded it into wings and stuck it to the melted taffy. worked perfect! i was thankful. i was about ready to take all the bees off and just add sprinkles to the cupcakes, which would have been completely fine if the paper wings didn't stick but i was glad they did.
then it came time to bring them all outside and set the table. on the way out the door, my assistant carriers, my husband and brother, each dropped a cupcake! it was a beautiful sunny day and about 20 minutes after everyone was here the cupcakes were melting so badly. then right before we were going to sing happy birthday, garret knocked an entire plate of them down. like i said, they were destained to be a mess. hey, all is well, we found the best looking one, stuck some candles in it and sang. after all they still tasted good :)
so thats my story for this week. moral of the story... pay a professional to make bee hive cupcakes for you if you want them. :)
thankful for:
a husband that can keep me laughing when things seem to be falling apart
a little girl that is full of life and personality
friends that help us celebrate milestones in our children's lives
God filling my head with ideas of ways to fix problems
beautiful weather for the outdoor party


 i had yarn wreaths with tshirt flowers and cereal box leaves

 i made cards from cereal boxes and fabric scraps
 chicken wire frames that you can use as a memo board, hair bow holder, a place for recipes or christmas cards...the options are endless
 i made a few fall and christmas buntings
 chalk boards from old thrifted frames, repainted.
 up cycled serving platters made from candle holders and vintage plates... also some of the smaller ones are great place for your watch and jewelry on your night stand or in the bathroom.
 upcycled tshirt scarfs! i just love these and how each one is so different.
 shelves made from pallets. these are great for book, plates, picture frames, wine bottles... whatever you like to display.